How to Upload Project From Android Studio to Github
Table of contents
- Step one - Sign Up GitHub and Install Git
- Step 2 - Enable Version Control Integration
- Pace three - Share Project on GitHub
- Make Changes to Your Files
- Step 1 - Commit your files
- Step 2 - Push your files
- Show Diff Before Commit
- Step 1 - Show Unequal
- Step two - Select "stride-past-step viewer"
- Step 3 - Review and Make Changes
The good thing about using Android Studio to upload your files to GitHub is it automatically figures out for y'all what files are required to commit and push to GitHub. For example, generated files are not required to commit and button to GitHub.
The following provides the pace-by-step instructions on how you can upload your Android studio projects to GitHub:
Pace 1 - Sign Up GitHub and Install Git
- Sign up github.com
- Download and install git from hither
Step 2 - Enable Version Control Integration
-
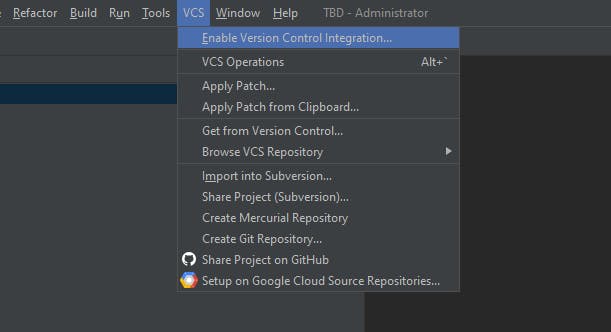
In your Android Studio, get to carte "VCS→Enable Version Control Integration..."
-
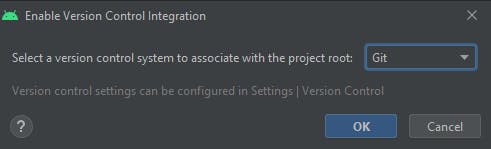
Select "Git" and click "OK"
Update: February 8, 2022: I learned that the .idea folder is unnecessary to be committed to repository because those files are specific to IDE configurations, which could be different per developer. In this case, you can update the .gitignore file to exclude them.
- Update
.gitignoreto ignore the entire.ideafolder (optional step)
In your root project folder, you should see .gitignore which have the post-obit default ignore for certain files and folders in the .idea folder.
Supercede these
/.idea/caches /.thought/libraries /.idea/modules.xml /.idea/workspace.xml /.idea/navEditor.xml /.thought/assetWizardSettings.xml With
/.idea To ignore the unabridged .idea folder instead.
-
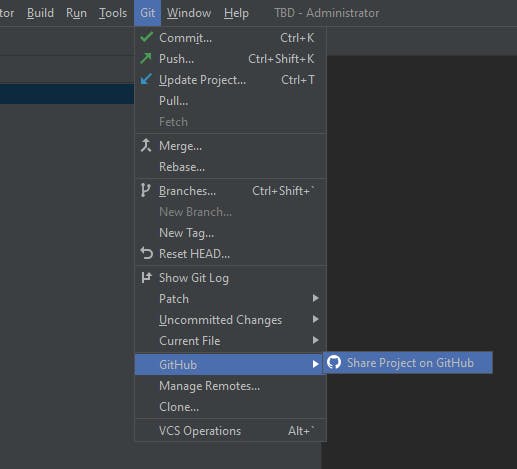
Go to carte du jour "Git→GitHub→Share Projection on GitHub"
-
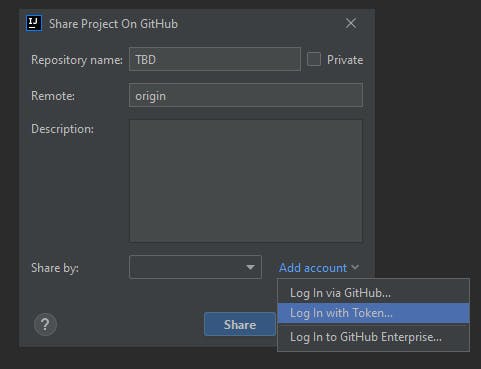
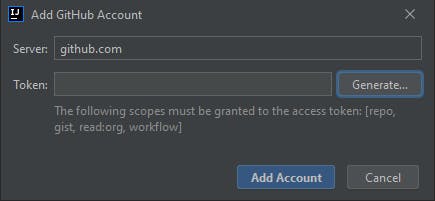
Login GitHub business relationship either via GitHub website or with token. GitHub website login didn't work for me. So I concluded upward use token instead.
-
Click "Generate..." and follow the instructions to get the generated token
-
Re-create and paste the token, click "Add Account"
-
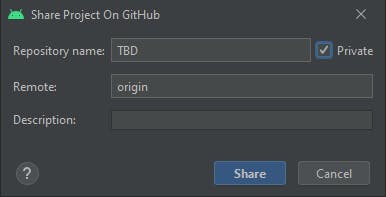
Proper noun your repository name, check "Private" if you desire to create a individual repository. And then, click "Share". A new repository is created.
-
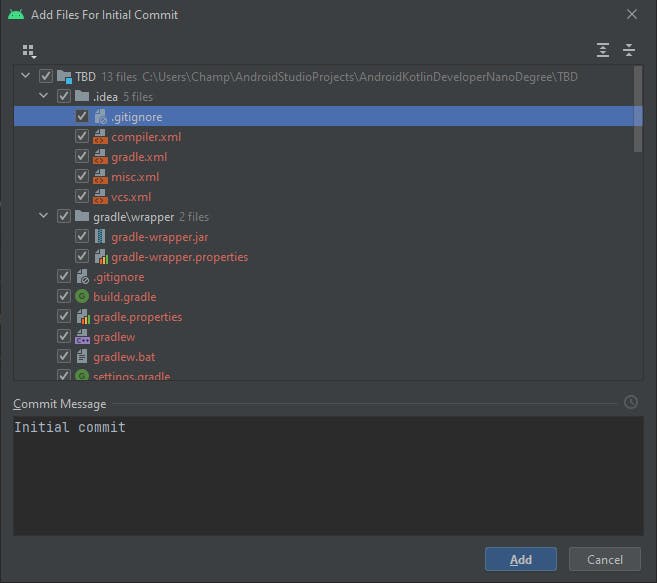
Click "Add" to commit your files
That is it. Your project now has been uploaded to your GitHub repository. After you brand some local changes to your file, y'all demand to commit and push those changes into a GitHub repository. The following steps evidence you how to do that.
Make Changes to Your Files
Step 1 - Commit your files
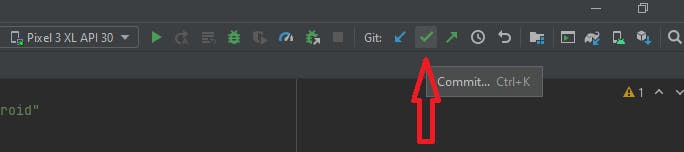
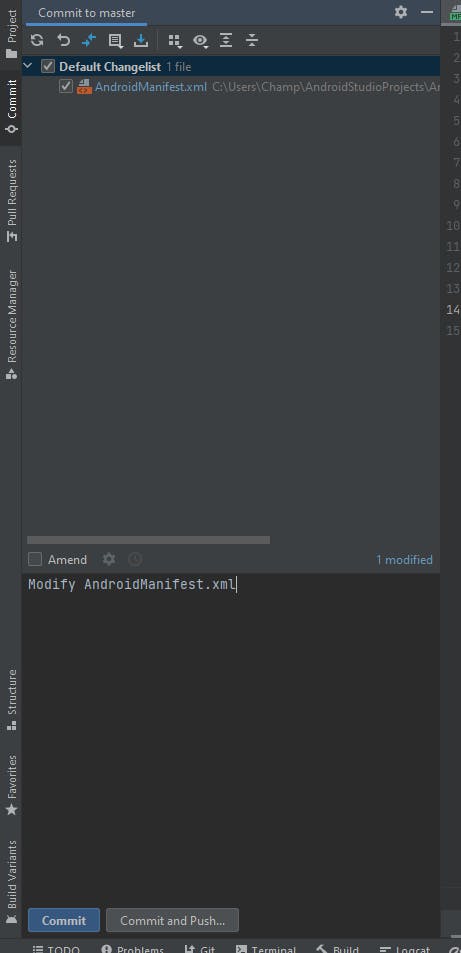
- Click "commit" in the top correct corner. You tin also go to menu "Git→Commit"
Step 2 - Push your files
-
Enter your commit clarification and click "Commit and Push..."
-
There are code assay warnings, you can either review them or only get ahead to push your files

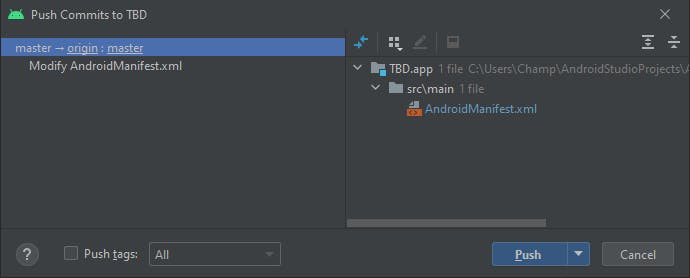
-
Click "Push". Your files have been updated in the repository
-
You lot tin likewise click "Commit" and push your files later on on. To push your files, click "button" in the top right corner. Y'all can likewise go to bill of fare "Git→Push". The rest of the steps are very like to "Commit and Button" above.

Another mutual thing I do earlier I commit the files is review my changes. The following steps show you how you can review and make any changes to your files in the committing screen.
Show Diff Earlier Commit
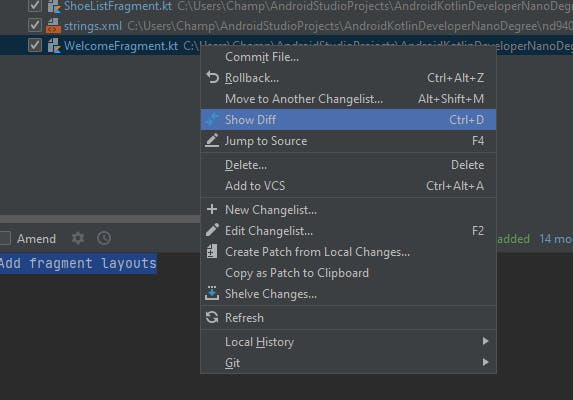
Step 1 - Bear witness Diff
- Select a file, right click and click "Evidence Unequal"
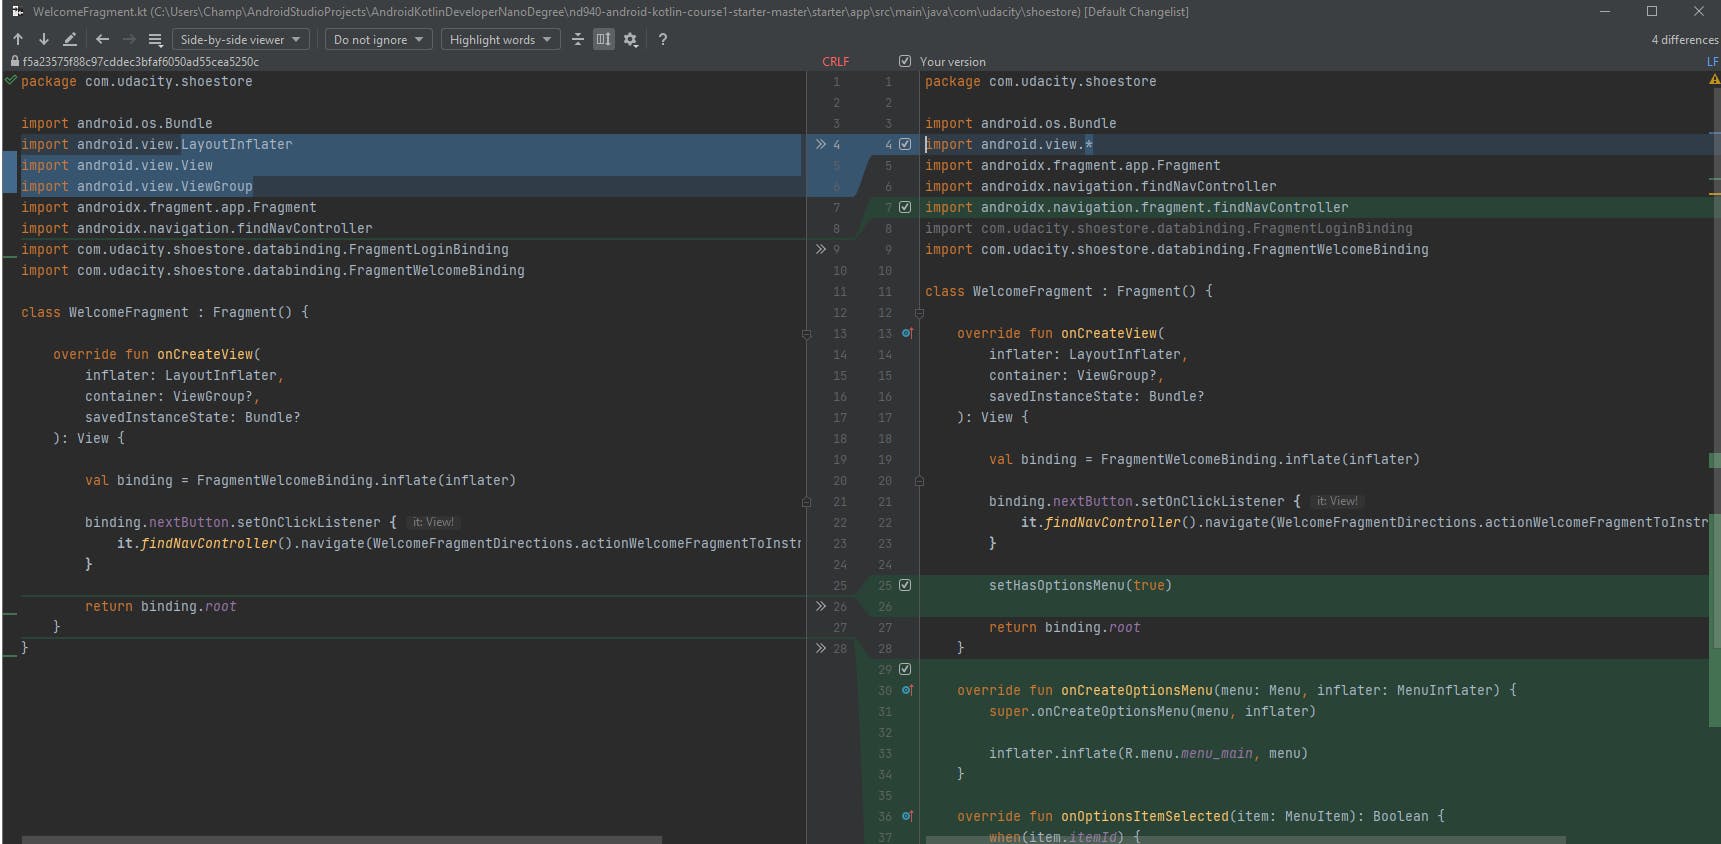
Step 2 - Select "step-by-step viewer"
- By default, it is "Unified viewer" which I don't like.
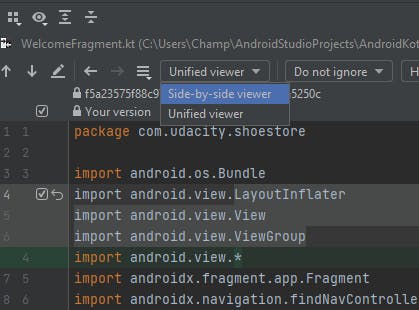
Step 3 - Review and Make Changes
- Now you tin review your alter. You tin can as well make changes to your file from this window.
Promise this helps! I'm new to GitHub and this is what I practise to commit and push my Android projects into my GitHub repositories
Did you find this commodity valuable?
Back up Vincent Tsen by becoming a sponsor. Any amount is appreciated!
Source: https://vtsen.hashnode.dev/how-to-upload-android-studio-project-to-github
0 Response to "How to Upload Project From Android Studio to Github"
Publicar un comentario